Drawing a cat can seem intimidating because of their fluid posture and delicate facial features. However, by breaking the feline form down into simple geometric foundations—a cranium circle, an oval torso, and curved gesture lines—any artist can draw a convincing cat with accurate proportions and lively personality.
A cat's eyes sit exactly on the horizontal halfway line of the skull sphere. The nose wedge occupies the lower third, and the triangular ears anchor at the 10 o'clock and 2 o'clock positions. Keeping the eyes spaced one eye-width apart ensures your drawing looks authentically feline rather than human.
Step-by-Step Illustrated Feline Drawing Guide
Follow these progressive stages to build your drawing from initial construction guidelines to finished value shading.
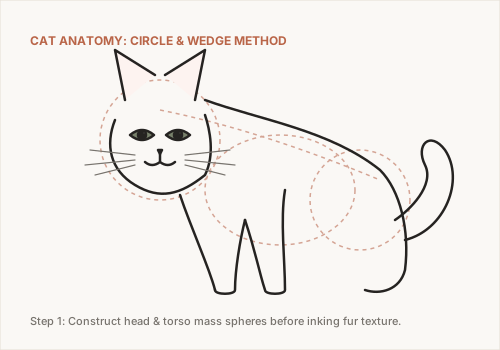
Construct the Head Sphere and Body Ovals
Begin with very light pencil pressure (HB or 2B). Draw a clean circle for the head cranium. Below and slightly behind it, sketch an overlapping egg-shaped oval for the ribcage, followed by a smaller circle for the hip and pelvis region.
Connect these masses with a sweeping S-curve representing the cat's flexible spine. This initial gestural skeleton establishes the animal's posture before you commit to detailed outlines.
Map the Facial Cross and Muzzle Wedge
Divide the head sphere with a vertical centerline following the direction the cat is looking. Draw a curved horizontal line across the center equator. This cross sets the perspective plane of the face.
Beneath the intersection, sketch a small downward-pointing triangular wedge for the snout and nose leather. Anchor two wide-based triangles at the upper corners of the head for the ears, ensuring the ear openings angle slightly forward.
Render Expressive Almond Eyes and Whisker Pads
Cats have distinctive almond-shaped eyes with slightly slanted outer corners. Draw two gentle arcs along the horizontal guideline. Inside each eye, place a vertical oval pupil for domestic cats in moderate light, or a round pupil for low-light alertness.
Reserve a tiny crisp white dot in the upper corner of each pupil for the specular highlight. Curve two rounded cheek pads outward from beneath the nose to create the muzzle.
Connect Limbs, Paws, and the Sweeping Tail
Drop two straight cylindrical lines down from the chest for the front legs, tapering into soft, rounded paw pads with three visible forward toes. For a seated cat, draw the large curved thigh muscle hugging the flank.
Extend the tail from the base of the spine, allowing it to curl gracefully around the paws. A relaxed, curved tail reinforces the cat's balance and compositional rhythm.
Shade Fur Direction, Core Shadows, and Whiskers
Switch to a soft 4B pencil. Lightly erase your internal construction circles with a kneaded eraser. Shade in the direction of natural fur growth: outward from the bridge of the nose, radiating across the cheeks, and flowing downward along the neck and spine.
Deepen core shadows under the chin, beneath the belly, and inside the ear cavities. Finally, use a very sharp pencil or fine inking pen to add long, springing whiskers curving outward from the muzzle and above the eyebrows.
How to Draw a Cute / Stylized Cat (Chibi Method)
If your goal is a simplified, cute, or kawaii-style cat drawing, alter the proportional ratios: make the head sphere significantly larger than the body (a 1:1 ratio), move the eyes lower on the face, widen the eye spacing, and shorten the muzzle to a tiny dot. This childlike aesthetic instantly evokes playful charm.
- Drawing flat, triangular ears like cardboard: Cat ears are hollow cones. Always draw the inner rim thickness and the small pocket fold (Henry's pocket) on the outer lower ear edge.
- Over-drawing individual hairs: Do not scratch thousands of separate lines. Group fur into soft tonal masses and render texture only along edge contours and cast shadow boundaries.
- Stiff whiskers: Whiskers should never look like rigid spikes. Use a quick, flicking wrist motion to generate tapered lines that arch downward with gravity.
Continue Your Animal Sketching Journey
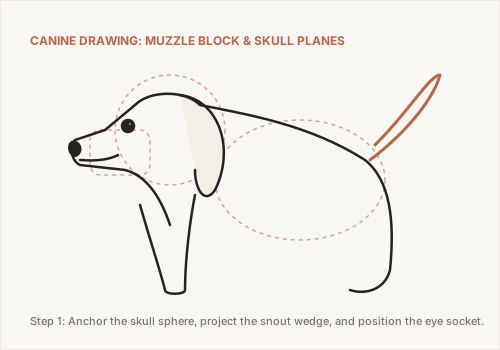
Now that you've mastered feline anatomy, explore our companion tutorial on How to Draw a Dog to compare snout structures, or dive deeper into realistic eye illumination with our Drawing Eyes Masterclass.