Dogs are celebrated for their loyalty, expressive eyes, and dynamic physical range. Because domestic dogs vary dramatically in breed shape—from slender greyhounds to boxy bulldogs—understanding the fundamental architectural planes of the canine skull and torso is the key to drawing any dog convincingly.
Unlike the relatively flat feline facial plane, a dog's head is defined by the "stop"—the distinct angle where the brow slopes down into the protruding muzzle bridge. Getting this angle correct immediately gives your drawing genuine canine character.
Step-by-Step Illustrated Dog Drawing Guide
Follow these progressive stages to build a versatile domestic dog portrait from basic volumes to finished fur values.
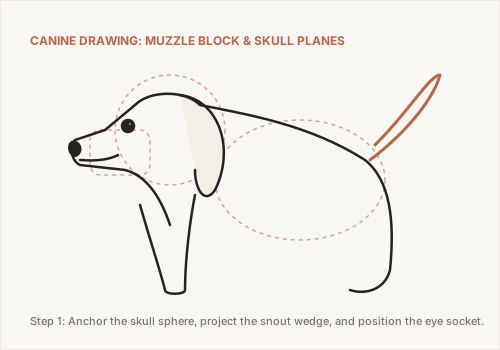
Block the Cranium Sphere and Snout Box
Lightly sketch a circle representing the braincase cranium. Attached to the lower front of this circle, project a rectangular 3D box for the muzzle. The length of this box depends on the breed; for a medium retriever, it should measure approximately two-thirds the length of the cranium.
Establish the center plane running down the forehead and along the top ridge of the snout to keep your features aligned in perspective.
Position Eyes, Nose Leather, and Jawline
Canine eyes are positioned slightly more to the sides of the head than feline eyes. Draw two round eyes tucked just behind the brow line. At the tip of the snout box, sketch the heart-shaped nose pad with comma-shaped nostril openings.
Draw the mouth line splitting beneath the nose, curving downward into the fleshy upper lips (flews) that drape naturally over the lower jaw.
Shape the Ears: Floppy, Folded, or Erect
Ear structure defines breed character. For floppy ears (like labradors and spaniels), draw curved teardrop shapes hanging down along the cheeks, beginning from a fold just above eye level.
For erect ears (like German shepherds and huskies), draw tall triangles positioned high on the head, paying attention to the hollow inner ear curves and rim hairs.
Construct Muscular Neck, Chest, and Fur Ruff
Broaden the lines beneath the head into a powerful, sloping neck connecting smoothly into the chest and shoulder blades. Dogs possess a strong muscular ruff along the throat.
Break up stiff contour lines with small zig-zag strokes that indicate thick fur layers around the collar and chest.
Render Value Depth, Moist Nose Texture, and Highlights
Using a soft 4B pencil, shade the dark pupil and warm iris, preserving a distinct highlight to give the dog that alert, soulful gaze. Shade the nose leather with stippling or small circular strokes, leaving a soft reflection along the top rim to convey moisture.
Layer tonal shading along the ears, neck folds, and snout sides, following the directional flow of the coat.
A dog's nose has a unique pebbled leather texture that catches ambient light. Instead of coloring it solid pitch black, shade it in dark graphite and use the tip of a clean eraser to tap out soft highlight spots along the bridge and nostrils.
Explore More Drawing Resources
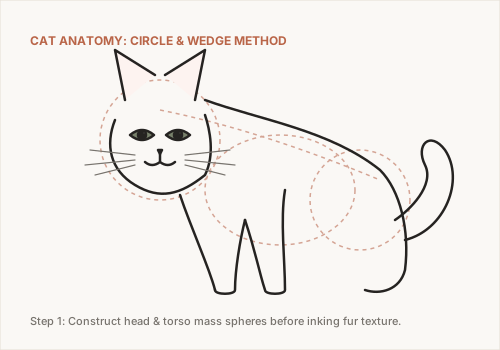
Compare canine anatomy with our feline guide in How to Draw a Cat, or visit our Easy Drawing Ideas Hub for beginner-friendly sketchbook prompts.