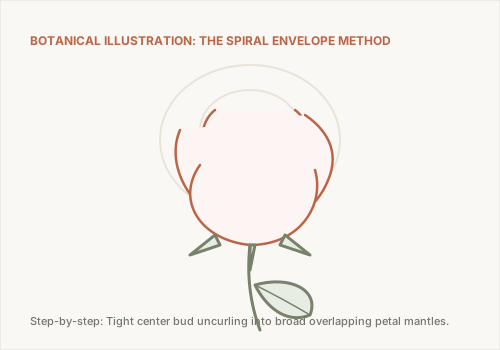
The rose is arguably the most beloved subject in botanical art, yet it frequently frustrates beginners because of its dozens of overlapping petals. The secret to drawing a convincing rose is to abandon drawing random curves and instead follow the natural organic spiral through which rose petals unfold from the center bud.
Think of a rose as a small cup nestled inside a bowl, surrounded by a saucer. The tightest petals form an inner spiraling bud cylinder; middle petals form a goblet cup; and mature outer petals curl backwards like wrapping mantles.
Step-by-Step Illustrated Rose Drawing Guide
Draw the Center Bud Spiral
Start in the upper center of your page. Draw a small, loose oval spiral resembling a snail shell or curled ribbon. This tight center represents the youngest petals still wrapped around the stamen core.
Keep your lines light and loose; this spiral anchors the focal point of the entire bloom.
Enclose the Inner Goblet Cup
Beneath the center spiral, draw a rounded U-shaped curve to form the base of the central rose cup. Connect the outer edges of this U-cup back up to the sides of the spiral.
Draw overlapping petal rims curving across the opening of the cup, ensuring that one petal drapes over the edge of another like folded velvet.
Layer the Middle Wrapping Petals
Extend larger petal arcs around the goblet. Instead of drawing uniform concentric rings, stagger the petals so each new layer covers the seam between the two petals beneath it.
Give each petal a gentle dip or crease at its center crest, indicating where the petal naturally folds as it opens to the sunlight.
Add Broad Outer Curling Mantles and Stem
Draw the outermost petals flaring downward and outward. These mature petals display their underside surfaces with prominent curled edges. Below the bloom, draw the calyx receptacle and three to five pointed green sepals curling outward.
Drop a firm, slightly curved stem downward, adding small triangular thorns and serrated rose leaves grouped in sets of three or five leaflets.
Shade Petal Depths and Core Gradients
Shading gives the rose dramatic three-dimensional form. Apply the deepest shadows inside the central spiral crevices and beneath overlapping petal rims. Use soft, directional hatching that follows the curve of each petal.
Leave the outermost curling rims bright white or very light to maximize value contrast and create the illusion of translucent petals.
Further Botanical Studies
Continue exploring floral anatomy with our tutorials on How to Draw a Sunflower and our multi-study collection of 12 Easy Flowers to Draw for Beginners.